


How-To Create and Preserve the Perfect Jack-o-Lantern
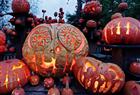
(Image via Edmonton Journal)
September 29, 2019
We may only be a few weeks into autumn, but everybody knows what’s in the air: Halloween season! While there is still sometime before the costume-creating, candy-crazy decorating frenzy begins, stores are already opening their doors to terrifying costumes and those classic round pumpkins that remind us all of the witchy night to come, and those precise pumpkins are what this how-to article is going to let you know how to master: jack-o-lanterns! Jack-o-lanterns are notorious for turning out either somewhat unsightly or completely collapsing in on themselves, and if you struggle with either (or both, really, let’s be honest) here are some tips and tricks to keep your jack-o-lantern in tip-top shape.
First off, you are going to get your pumpkin. According to mentalfloss.com, do not shy away from pumpkins that have a bit longer, greener stem-those stems are the source of life for pumpkins and the greener the stem, the longer it will be before that pumpkin gets dry. Once you have claimed your pumpkin prize, go home and prepare to scoop out all the pumpkin guts. After some research, Farmer’s Almanac informed me that it is better to cut out a piece of the bottom of the pumpkin because this allows moisture to seep out of the pumpkin instead of pooling at the bottom and speeding up the rotting process. Handily enough, this also makes for easier candle placement! Next, it is time to rid your pumpkin of its innards. The pumpkin carving experts at mentalfloss.com say that any tool can be a tool for this task: paring knives, salad serving spoons, or the orange scoops provided by pumpkin-carving kits. Be sure to remove all of the seeds and pumpkin goop-you want those inner walls to be completely clean before you begin your carving process.
Now that your pumpkin is ready to be carved, have a carving plan. If it is a design you have in mind or even one that you have bought on paper from a store, make sure you have decided what you are going to do to that poor, unsuspecting pumpkin. John Points, an expert carver, recommends pricking small points in the face of the pumpkin regardless of whether or not you will be freehanding your pumpkin art. If you will be using a store-bought design, take a pair of scissors to the piece of paper and cut small slices all around the paper, then tape it to the pumpkin using masking tape before putting those small points in. Once you have your design traced into the face of the pumpkin, you are ready to carve! As reported by the article “Best Pumpkin-Carving Tools,” some of the best tools to use are paring knives, the Pumpkin Master carving kit, or linoleum cutters (personally, I say your own hands can be your torture weapon if you’re brave enough). Once you’ve got your tool in hand, begin carving your piece of pumpkin art.
For one last step, you have to take some extra precautions to be clear of any rotting, mold or collapsing before Halloween. Farmer’s Almanac recommends taking a spray bottle and filling it up with one tablespoon of bleach (wear gloves, so you don’t burn yourself) per quart of water and spraying the cut edges and insides thoroughly, then allowing it to dry. If it is going to be a while before your pumpkin goes out on full display, experts at mentalfloss.com recommend tightly wrapping your pumpkin in plastic wrap and placing it in a cold area, such as your fridge. Once your pumpkin is going out on your porch, put a LED light (LED lights are bright but also cold, so your pumpkin doesn’t soften) down onto the surface your pumpkin will be going. You can then place the pumpkin over the light and enjoy the light shining out from your expertly carved masterpiece.
If you follow these simple steps, you are sure to have a great Jack-o-Lantern. Have fun carving and have a Happy Halloween!